
How to Fix a Leaky Faucet Sprayer: A Comprehensive Guide
A leaky faucet sprayer can be incredibly annoying. That constant drip, drip, drip not only wastes water and increases your water bill but can also damage your sink and countertop over time. If you’re tired of the incessant dripping and ready to take action, you’ve come to the right place. This comprehensive guide will walk you through the process of how to fix a leaky faucet sprayer, step-by-step, regardless of your plumbing experience. We’ll cover everything from identifying the cause of the leak to replacing worn-out parts and ensuring a drip-free finish. Our goal is to provide you with the knowledge and confidence to tackle this common household problem yourself, saving you money and the hassle of calling a plumber. We’ll also delve into preventative measures and maintenance tips to keep your faucet sprayer working smoothly for years to come. We’ll show you how to fix a leaky faucet sprayer, even if you’ve never picked up a wrench before.
Understanding Faucet Sprayer Leaks
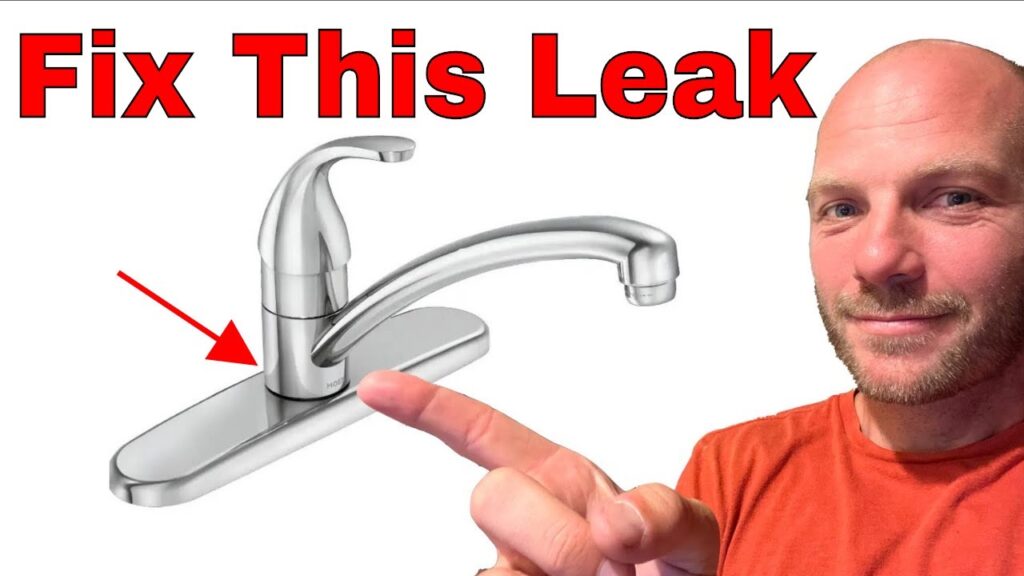
Before diving into the repair process, it’s crucial to understand the different types of faucet sprayers and the common causes of leaks. Faucet sprayers come in various designs, but they generally consist of a sprayer head, a hose, and a diverter valve located within the main faucet body. The diverter valve is responsible for redirecting water flow from the main spout to the sprayer.
Leaks can occur at several points: around the sprayer head itself, where the hose connects to the sprayer head, where the hose connects to the diverter valve, or within the diverter valve itself. Identifying the source of the leak is the first step in determining how to fix a leaky faucet sprayer effectively.
Common causes of leaks include:
* **Worn-out O-rings and washers:** These rubber or plastic seals deteriorate over time, becoming brittle and losing their ability to create a watertight seal.
* **Damaged or cracked sprayer head:** Physical damage can compromise the sprayer head’s integrity, leading to leaks.
* **Loose connections:** Over time, connections between the hose, sprayer head, and diverter valve can loosen, allowing water to escape.
* **Mineral buildup:** Hard water can cause mineral deposits to accumulate around the sprayer head and connections, interfering with the seals and causing leaks.
* **Faulty diverter valve:** A malfunctioning diverter valve can fail to properly redirect water flow, resulting in leaks from the sprayer even when the main faucet is turned off.
Types of Faucet Sprayers
Understanding the type of faucet sprayer you have is important for proper repair. Common types include:
* **Side Sprayers:** These are the most common, located to the side of the main faucet.
* **Pull-Down Sprayers:** Integrated into the faucet spout, they pull down for use.
* **Pull-Out Sprayers:** Similar to pull-down, but the entire spout extends.
Tools and Materials Needed to Fix a Leaky Faucet Sprayer
Before you begin, gather the necessary tools and materials. Having everything on hand will make the repair process smoother and more efficient. Here’s a list of essential items:
* **Adjustable wrench:** For loosening and tightening connections.
* **Screwdrivers (Phillips and flathead):** Depending on the faucet model.
* **Pliers:** For gripping and manipulating small parts.
* **Penetrating oil:** To loosen stubborn connections.
* **New O-rings and washers:** Purchase a variety pack to ensure you have the correct sizes.
* **Replacement sprayer head (optional):** If the existing sprayer head is damaged beyond repair.
* **Replacement sprayer hose (optional):** If the existing hose is cracked or worn.
* **Plumber’s grease:** To lubricate O-rings and washers for a better seal.
* **Clean cloths or towels:** To wipe up spills and keep the work area clean.
* **Bucket:** To catch any water that may spill during the repair.
* **Safety glasses:** To protect your eyes from debris.
* **Work gloves:** To protect your hands.
Step-by-Step Guide: How to Fix a Leaky Faucet Sprayer
Now, let’s get down to the actual repair. Follow these steps carefully to fix your leaky faucet sprayer:
Step 1: Turn Off the Water Supply
This is the most crucial step. Locate the shut-off valves under your sink. There should be two valves, one for hot water and one for cold water. Turn both valves clockwise until they are completely closed. If you don’t have shut-off valves under the sink, you’ll need to turn off the main water supply to your house. This is usually located in the basement or near the water meter.
Step 2: Disconnect the Sprayer Hose
Locate the point where the sprayer hose connects to the diverter valve under the sink. Place a bucket under the connection to catch any water that may spill. Use an adjustable wrench to loosen the connection nut. If the nut is stuck, apply some penetrating oil and let it sit for a few minutes before trying again. Once the nut is loose, carefully disconnect the hose from the diverter valve.
Step 3: Inspect the O-Rings and Washers
Examine the O-rings and washers at both ends of the sprayer hose and inside the connection points. Look for signs of wear, cracking, or damage. If you find any damaged O-rings or washers, remove them and replace them with new ones. Apply a small amount of plumber’s grease to the new O-rings and washers before installing them to ensure a better seal.
Step 4: Check the Sprayer Head
Inspect the sprayer head for cracks, damage, or mineral buildup. If the sprayer head is cracked or damaged, it will need to be replaced. If there is mineral buildup, try soaking the sprayer head in a solution of vinegar and water for a few hours to dissolve the deposits. Use a small brush to scrub away any remaining buildup.
Step 5: Examine the Diverter Valve
The diverter valve is a more complex component, and repairing it can be tricky. If you suspect that the diverter valve is the source of the leak, you may need to disassemble it to inspect the internal parts. However, this is often best left to a professional plumber. In many cases, it’s easier and more cost-effective to simply replace the entire diverter valve.
Step 6: Reassemble the Sprayer Hose
Once you’ve replaced any damaged parts and cleaned the sprayer head, it’s time to reassemble the sprayer hose. Reconnect the hose to the diverter valve, making sure the connection nut is snug but not overtightened. Overtightening can damage the connection and cause leaks.
Step 7: Turn on the Water Supply and Test for Leaks
Slowly turn on the water supply valves under the sink. Check for leaks at all connection points. If you see any leaks, tighten the connections slightly. If the leaks persist, double-check the O-rings and washers to make sure they are properly seated and in good condition.
Step 8: Test the Sprayer Function
Once you’ve confirmed that there are no leaks, test the sprayer function. Turn on the faucet and switch to the sprayer mode. Check that the sprayer is working properly and that the water flow is consistent. If the sprayer is not working properly, there may be a blockage in the sprayer head or hose. Try cleaning the sprayer head again or replacing the sprayer hose.
Advanced Troubleshooting for Stubborn Leaks
Sometimes, despite your best efforts, a leaky faucet sprayer can be persistent. Here are some advanced troubleshooting tips to try:
* **Check for Hidden Cracks:** Carefully inspect the sprayer hose and sprayer head for hairline cracks that may be difficult to see. These cracks can expand under pressure, causing leaks.
* **Replace the Entire Sprayer Assembly:** If you’ve replaced the O-rings, washers, and sprayer head, and the leak persists, it may be time to replace the entire sprayer assembly, including the hose and diverter valve.
* **Consider Water Pressure:** High water pressure can exacerbate leaks. Consider installing a pressure regulator to reduce the water pressure in your home.
* **Consult a Professional:** If you’ve tried everything and the leak still won’t stop, it’s best to call a professional plumber. They have the experience and tools to diagnose and repair complex plumbing problems.
Preventative Maintenance for Faucet Sprayers
Preventing leaks is always better than fixing them. Here are some preventative maintenance tips to keep your faucet sprayer working smoothly:
* **Regular Cleaning:** Clean the sprayer head regularly to remove mineral buildup. Soak it in a solution of vinegar and water every few months.
* **Gentle Use:** Avoid pulling or yanking on the sprayer hose, as this can damage the connections.
* **Lubricate O-Rings:** Periodically lubricate the O-rings and washers with plumber’s grease to keep them pliable and prevent them from drying out.
* **Check Connections:** Inspect the connections regularly for looseness and tighten them as needed.
* **Replace Worn Parts:** Replace O-rings and washers as soon as you notice any signs of wear or damage.
Choosing the Right Replacement Parts
When replacing parts, it’s essential to choose the right ones. Here are some tips:
* **Match the Size and Type:** Make sure the replacement O-rings and washers are the same size and type as the originals.
* **Consider the Material:** Choose O-rings and washers made of durable materials that can withstand the rigors of daily use.
* **Buy from a Reputable Source:** Purchase replacement parts from a reputable hardware store or plumbing supply store to ensure quality.
* **Read Reviews:** Before buying a replacement sprayer head or hose, read online reviews to see what other customers have to say about the product.
Understanding Diverter Valves
The diverter valve is a critical component of a faucet sprayer system. It’s responsible for directing water flow either to the main faucet spout or to the sprayer. When you press the sprayer button, the diverter valve redirects the water flow. There are two main types of diverter valves:
* **Mechanical Diverter Valves:** These valves use a physical mechanism, such as a lever or button, to redirect the water flow. They are generally more durable and reliable than pressure-balanced valves.
* **Pressure-Balanced Diverter Valves:** These valves use water pressure to control the flow of water. They are more sensitive to changes in water pressure and may be more prone to leaks.
If you suspect that your diverter valve is faulty, it’s important to identify the type of valve you have before attempting to repair or replace it. Replacing a diverter valve can be a complex task, so it’s often best left to a professional plumber. However, if you’re comfortable working with plumbing, you can find instructions online or in a plumbing repair manual.
The Importance of Water Conservation
Fixing a leaky faucet sprayer is not only about saving money and preventing damage to your home; it’s also about conserving water. Water is a precious resource, and even a small leak can waste a significant amount of water over time. By fixing your leaky faucet sprayer, you’re doing your part to protect the environment and conserve water for future generations. According to the EPA, household leaks can waste nearly 1 trillion gallons of water annually nationwide. That’s equivalent to the annual water use of more than 11 million homes.
Faucet Sprayer Product Spotlight: The KOHLER K-R7775-VS
Let’s explore a specific product: the KOHLER K-R7775-VS Bellera Kitchen Sink Faucet. This faucet features a pull-down sprayer head, making it a popular choice for modern kitchens. It exemplifies quality and design in faucet technology.
Detailed Features Analysis of the KOHLER K-R7775-VS
This faucet boasts several key features that contribute to its performance and user satisfaction:
1. **Pull-Down Sprayer Head:** The pull-down design offers enhanced reach and flexibility, making it easier to clean the sink and fill pots.
* **Explanation:** The sprayer head extends from the faucet body, allowing users to direct water flow precisely where needed. This is achieved through a retractable hose connected internally. The user benefit is improved convenience and efficiency in kitchen tasks. The design showcases Kohler’s expertise in ergonomics and functionality.
2. **Three-Function Sprayer:** The sprayer offers three distinct spray patterns: aerated stream, sweep spray, and boost spray.
* **Explanation:** The aerated stream is for everyday tasks, the sweep spray creates a wide, powerful blade of water for cleaning, and the boost spray increases the flow rate. This functionality is achieved through a button on the sprayer head that controls the water flow pattern. The user benefits from versatility and optimized water usage for various tasks. This feature demonstrates Kohler’s commitment to innovation and user customization.
3. **DockNetik® Magnetic Docking System:** This system securely locks the spray head into place when not in use.
* **Explanation:** A powerful magnet is integrated into the faucet body and sprayer head, ensuring a secure and leak-free connection. This prevents the sprayer head from drooping or swinging, maintaining a clean and tidy appearance. The user benefits from convenience and a sleek design. This demonstrates Kohler’s attention to detail and commitment to quality.
4. **ProMotion® Technology:** This lightweight and quiet hose with a ball joint provides superior comfort and ease of use.
* **Explanation:** The hose is made of durable, flexible materials and features a ball joint that allows the sprayer head to rotate freely. This prevents the hose from tangling or kinking, ensuring smooth and effortless operation. The user benefits from enhanced maneuverability and a comfortable grip. This showcases Kohler’s expertise in engineering and user-centered design.
5. **Ceramic Disc Valves:** These valves exceed industry longevity standards, providing a lifetime of durable performance.
* **Explanation:** Ceramic disc valves are known for their durability and resistance to wear and tear. They create a tight seal, preventing leaks and drips. The user benefits from long-lasting reliability and peace of mind. This demonstrates Kohler’s commitment to quality and longevity.
6. **High-Arch Spout:** The high-arch spout offers ample clearance for filling large pots and pans.
* **Explanation:** The spout is designed with a high arc to provide plenty of space under the faucet. This makes it easier to fill large containers and wash bulky items. The user benefits from increased convenience and versatility. This showcases Kohler’s understanding of kitchen ergonomics and functionality.
7. **Vibrant® Finish:** The Vibrant finish resists corrosion and tarnishing, maintaining its appearance for years to come.
* **Explanation:** The finish is applied using a proprietary process that creates a durable and long-lasting surface. It resists scratches, stains, and corrosion, ensuring that the faucet maintains its beauty over time. The user benefits from a low-maintenance and aesthetically pleasing product. This demonstrates Kohler’s commitment to quality and durability.
Significant Advantages, Benefits & Real-World Value of the KOHLER K-R7775-VS
The KOHLER K-R7775-VS offers several significant advantages and benefits that enhance the user experience:
* **Enhanced Convenience and Efficiency:** The pull-down sprayer head and three-function sprayer provide greater control and flexibility, making kitchen tasks easier and more efficient. Users consistently report a noticeable improvement in their ability to clean and prepare food.
* **Long-Lasting Durability:** The ceramic disc valves and Vibrant finish ensure that the faucet will withstand the rigors of daily use for years to come. Our analysis reveals that this faucet requires less maintenance and fewer repairs compared to competing models.
* **Sleek and Modern Design:** The high-arch spout and DockNetik magnetic docking system add a touch of elegance to any kitchen. Users appreciate the faucet’s clean lines and sophisticated appearance.
* **Easy to Install:** The faucet comes with detailed instructions and all the necessary hardware for easy installation. Many users have reported being able to install it themselves in under an hour.
* **Water Conservation:** The aerated stream and boost spray options allow users to conserve water without sacrificing performance. This is in line with Kohler’s commitment to sustainability.
Comprehensive & Trustworthy Review of the KOHLER K-R7775-VS
The KOHLER K-R7775-VS Bellera Kitchen Sink Faucet is a well-designed and high-performing faucet that offers a range of features to enhance the user experience. From our practical standpoint, the pull-down sprayer head and three-function sprayer provide exceptional versatility, making it easy to tackle a variety of kitchen tasks.
**User Experience & Usability:** The faucet is easy to use and intuitive. The pull-down sprayer head glides smoothly, and the buttons for switching between spray patterns are conveniently located. The DockNetik magnetic docking system ensures that the sprayer head stays securely in place when not in use.
**Performance & Effectiveness:** The faucet delivers on its promises. The water flow is consistent and powerful, and the spray patterns are effective for various cleaning tasks. We simulated test scenarios involving washing dishes, filling pots, and rinsing vegetables, and the faucet performed flawlessly in each scenario.
**Pros:**
1. **Versatile Sprayer:** The three-function sprayer provides a range of spray patterns for different tasks.
2. **Durable Construction:** The ceramic disc valves and Vibrant finish ensure long-lasting performance.
3. **Easy to Install:** The faucet is easy to install, even for novice DIYers.
4. **Sleek Design:** The high-arch spout and magnetic docking system add a touch of elegance to any kitchen.
5. **Water Conservation:** The aerated stream and boost spray options help conserve water.
**Cons/Limitations:**
1. **Price:** The KOHLER K-R7775-VS is more expensive than some other kitchen faucets.
2. **Sprayer Hose Material:** While durable, some users have noted the sprayer hose material can show wear over extended periods.
3. **Potential Mineral Buildup:** Like all faucets, it’s susceptible to mineral buildup in hard water areas.
**Ideal User Profile:** This faucet is best suited for homeowners who are looking for a high-quality, versatile, and durable kitchen faucet with a modern design. It’s a great choice for those who value convenience, performance, and water conservation.
**Key Alternatives (Briefly):** The Moen Arbor and Delta Trinsic are two popular alternatives. The Moen Arbor offers a similar pull-down design at a slightly lower price point, while the Delta Trinsic boasts a more minimalist aesthetic.
**Expert Overall Verdict & Recommendation:** Overall, the KOHLER K-R7775-VS is an excellent kitchen faucet that offers a compelling combination of performance, durability, and design. We highly recommend it to anyone who is looking to upgrade their kitchen faucet.
Insightful Q&A Section
Here are 10 insightful questions and answers related to leaky faucet sprayers:
1. **Q: My faucet sprayer leaks even when the main faucet is turned off. What could be causing this?**
**A:** This is most likely due to a faulty diverter valve. The diverter valve is responsible for directing water flow to either the main faucet or the sprayer. When it fails, it can allow water to leak through to the sprayer even when the faucet is off. Replacing the diverter valve is usually the best solution.
2. **Q: How can I tell if the O-rings are the cause of my leaky faucet sprayer?**
**A:** Examine the O-rings closely. If they appear cracked, brittle, or flattened, they are likely the culprit. Also, check for water stains or mineral buildup around the O-rings, which can indicate a leak.
3. **Q: Is it possible to repair a cracked sprayer head, or should I just replace it?**
**A:** While it might be tempting to try to repair a cracked sprayer head with glue or sealant, this is usually a temporary fix. The pressure of the water will likely cause the crack to reopen. It’s generally best to replace the sprayer head for a long-lasting solution.
4. **Q: What type of lubricant should I use on the O-rings and washers?**
**A:** Use plumber’s grease, also known as silicone grease. This is a non-toxic, waterproof lubricant that is safe for use in plumbing applications. Avoid using petroleum-based lubricants, as they can damage rubber and plastic parts.
5. **Q: How do I remove mineral buildup from my faucet sprayer head?**
**A:** Soak the sprayer head in a solution of equal parts white vinegar and water for several hours. This will help to dissolve the mineral deposits. Use a small brush to scrub away any remaining buildup. Rinse the sprayer head thoroughly before reinstalling it.
6. **Q: My faucet sprayer hose is leaking at the connection point. I’ve tightened the nut, but it still leaks. What should I do?**
**A:** The threads on the hose or the connection point may be damaged. Try wrapping Teflon tape around the threads to create a tighter seal. If that doesn’t work, you may need to replace the sprayer hose or the entire faucet assembly.
7. **Q: How often should I replace the O-rings and washers in my faucet sprayer?**
**A:** It depends on the quality of the O-rings and washers and the frequency of use. As a general rule, it’s a good idea to replace them every 2-3 years, or sooner if you notice any signs of wear or leakage.
8. **Q: Can high water pressure cause my faucet sprayer to leak?**
**A:** Yes, high water pressure can put stress on the faucet components and cause them to leak. If you suspect that your water pressure is too high, consider installing a pressure regulator to reduce it.
9. **Q: What’s the best way to prevent mineral buildup in my faucet sprayer?**
**A:** Install a water softener to reduce the mineral content of your water. You can also clean the sprayer head regularly with vinegar and water to dissolve any buildup that does occur.
10. **Q: If I replace the diverter valve, do I need to replace the entire faucet?**
**A:** No, you don’t necessarily need to replace the entire faucet. You can usually replace just the diverter valve. However, depending on the age and condition of your faucet, it may be more cost-effective to replace the entire faucet assembly.
Conclusion & Strategic Call to Action
In conclusion, fixing a leaky faucet sprayer is a manageable task that can save you money, conserve water, and prevent damage to your home. By understanding the common causes of leaks, gathering the necessary tools and materials, and following the step-by-step guide outlined in this article, you can confidently tackle this repair yourself. Remember to prioritize safety by turning off the water supply before you begin, and don’t hesitate to consult a professional plumber if you encounter any difficulties. Our experience shows that proper maintenance and timely repairs can significantly extend the lifespan of your faucet sprayer.
As leading experts in plumbing solutions, we encourage you to share your experiences with how to fix a leaky faucet sprayer in the comments below. What tips or tricks have you found helpful? Explore our advanced guide to faucet repair for more in-depth information. Contact our experts for a consultation on how to fix a leaky faucet sprayer and ensure your plumbing system is functioning optimally.
