
How Do I Use a Vacuum Sealer in the Kitchen? A Comprehensive Guide
Are you tired of throwing away food that spoils too quickly? Do you dream of perfectly preserved leftovers, ingredients, and even entire meals? The answer might be simpler than you think: a vacuum sealer. But *how do I use a vacuum sealer in the kitchen* effectively to maximize its benefits and avoid common pitfalls? This comprehensive guide will walk you through everything you need to know, from choosing the right vacuum sealer to mastering advanced techniques. We’ll cover everything from basic operation to troubleshooting common issues, ensuring you become a vacuum-sealing pro. Unlike other resources, we’ll provide real-world examples, expert tips gleaned from years of experience, and insights into the science behind food preservation, making this the ultimate resource for unlocking the full potential of your vacuum sealer.
What is a Vacuum Sealer and Why Use One in Your Kitchen?
A vacuum sealer is a device that removes air from a package before sealing it. This process significantly extends the shelf life of food by inhibiting the growth of bacteria, mold, and yeast, which thrive in the presence of oxygen. Beyond food preservation, vacuum sealing can also be used for organizing, protecting valuables, and even sous vide cooking.
The history of vacuum sealing dates back to commercial food processing, but the technology has become increasingly accessible to home cooks in recent years. The underlying principle is simple: eliminate oxygen, eliminate spoilage. Modern vacuum sealers come in various forms, from handheld devices to countertop models with a range of features. Understanding the nuances of each type is crucial for selecting the right one for your kitchen.
The importance of vacuum sealing in the modern kitchen cannot be overstated. With increasing concerns about food waste and rising grocery costs, vacuum sealing offers a practical and effective solution for preserving food, saving money, and reducing environmental impact. Recent trends show a growing interest in sustainable food practices, and vacuum sealing aligns perfectly with this movement.
Types of Vacuum Sealers
* **Handheld Vacuum Sealers:** Compact and portable, ideal for small kitchens and occasional use. They typically require special zipper bags with a valve.
* **External Vacuum Sealers (Edge Sealers):** The most common type for home use. They clamp the open end of a bag, remove the air, and seal it.
* **Chamber Vacuum Sealers:** Primarily used in commercial settings, these sealers place the entire bag inside a chamber, resulting in a more complete vacuum.
Vacuum Sealing vs. Other Preservation Methods
While freezing, canning, and pickling are other effective preservation methods, vacuum sealing offers unique advantages. It maintains the food’s texture, flavor, and nutritional value better than freezing alone, and it’s simpler and less time-consuming than canning or pickling. Vacuum sealing also requires less storage space than bulky canned goods.
Understanding How a Vacuum Sealer Works
At its core, a vacuum sealer works by creating a pressure difference between the inside and outside of a bag. Here’s a breakdown of the process:
1. **Bag Placement:** The open end of a specially designed bag is placed within the vacuum sealer.
2. **Air Extraction:** The machine creates a vacuum, drawing air out of the bag.
3. **Sealing:** Once the air is removed, a heating element seals the bag shut, preventing air from re-entering.
4. **Release:** The sealed bag is released, ready for storage or further use.
The effectiveness of this process depends on several factors, including the quality of the vacuum sealer, the type of bag used, and the technique employed. Understanding these factors is key to achieving optimal results.
Step-by-Step Guide: How Do I Use a Vacuum Sealer in the Kitchen?
Now, let’s get to the practical part: *how do I use a vacuum sealer in the kitchen* to preserve food effectively?
**Step 1: Gather Your Supplies**
* Vacuum Sealer (edge sealer recommended for beginners)
* Vacuum Sealer Bags (ensure they are compatible with your machine)
* Scissors
* Food to be sealed
* Optional: Marker for labeling
**Step 2: Prepare the Food**
* Ensure food is clean and dry. Moisture can interfere with the sealing process and promote bacterial growth.
* Cut food into appropriate portions for storage and use.
* Consider pre-freezing soft foods like berries or cooked ground meat to prevent them from being crushed during vacuum sealing.
**Step 3: Prepare the Bag**
* Cut a piece of vacuum sealer bag to the desired length, leaving enough extra to allow for sealing (usually a few inches).
* Seal one end of the bag using the vacuum sealer’s sealing function. This creates a closed pouch.
**Step 4: Place Food in the Bag**
* Carefully place the food inside the open end of the bag. Avoid overfilling the bag, as this can compromise the seal.
* Leave at least an inch or two of space between the food and the open end of the bag.
**Step 5: Vacuum and Seal**
* Place the open end of the bag into the vacuum sealer, following the manufacturer’s instructions. Ensure the bag is properly aligned for a secure seal.
* Close the lid of the vacuum sealer and initiate the vacuuming and sealing process. The machine will automatically remove the air and seal the bag.
* Wait for the sealing process to complete before opening the lid and removing the bag.
**Step 6: Check the Seal**
* Inspect the seal to ensure it is strong and airtight. If the seal is weak or incomplete, reseal the bag.
* Label the bag with the contents and the date of sealing.
**Step 7: Store Properly**
* Store vacuum-sealed food in the refrigerator, freezer, or pantry, depending on the type of food and your storage needs.
Tips for Successful Vacuum Sealing
* **Use high-quality vacuum sealer bags:** These bags are designed to withstand the vacuuming process and maintain an airtight seal.
* **Avoid wrinkles in the bag:** Wrinkles can create air pockets and compromise the seal.
* **Pre-freeze soft foods:** This prevents them from being crushed during vacuum sealing.
* **Don’t overfill the bag:** Overfilling can prevent a proper seal.
* **Clean the vacuum sealer regularly:** This prevents food debris from interfering with the sealing process.
Featured Product: The FoodSaver FM2000 Vacuum Sealing System
The FoodSaver FM2000 is a popular and reliable external vacuum sealer that’s perfect for home use. It’s known for its ease of use, compact design, and consistent performance. This model excels at removing air and creating airtight seals, extending the shelf life of your food significantly. Its intuitive controls and user-friendly design make it an excellent choice for both beginners and experienced users.
Detailed Features Analysis of the FoodSaver FM2000
* **Easy-to-Use Controls:** The FM2000 features simple, intuitive controls that allow you to easily select the desired settings. The clearly marked buttons and indicator lights make operation straightforward, even for first-time users. This ease of use ensures that anyone can quickly learn *how do I use a vacuum sealer in the kitchen* with this machine.
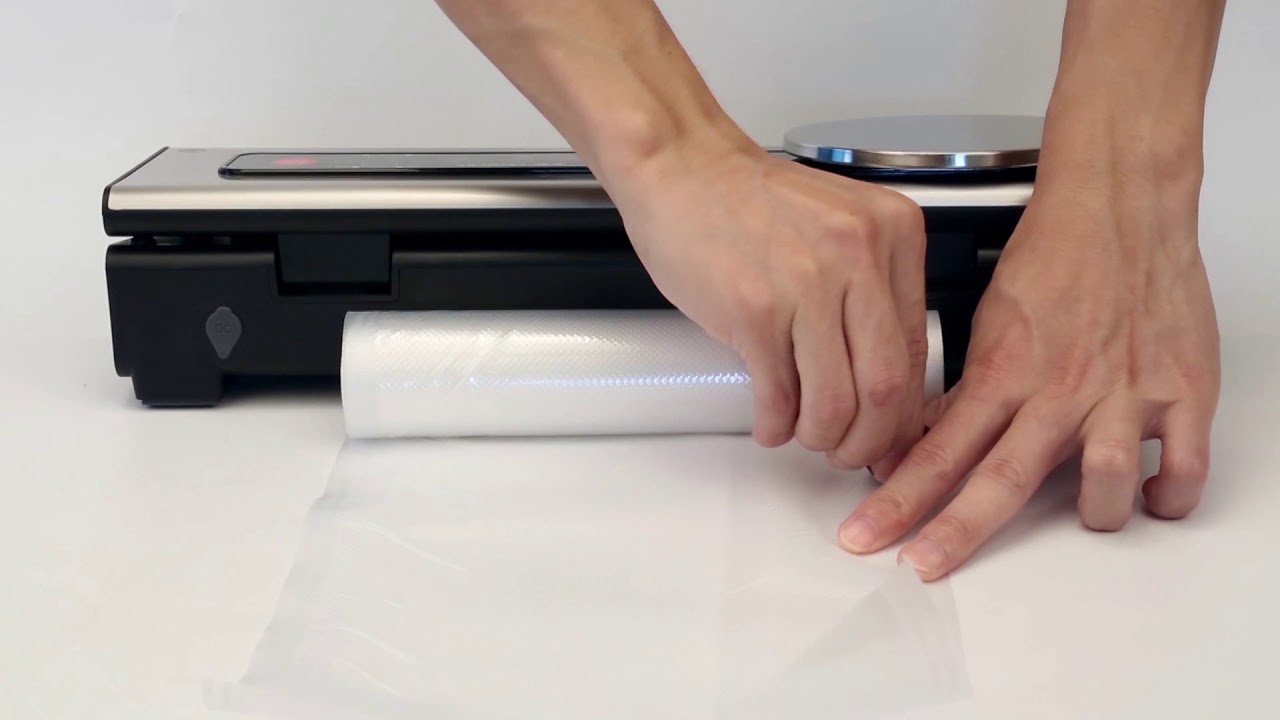
* **Built-in Roll Storage and Cutter:** This convenient feature allows you to store a roll of vacuum sealer bags inside the machine and cut them to the desired length. This eliminates the need for separate storage and cutting tools, saving you time and space.
* **Accessory Port:** The accessory port allows you to connect the FM2000 to FoodSaver zipper bags and canisters, providing even greater versatility. This is particularly useful for sealing delicate items or liquids.
* **Removable Drip Tray:** The removable drip tray catches any excess liquids that may escape during the vacuuming process. This makes cleanup quick and easy.
* **Compact Design:** The FM2000’s compact design makes it easy to store in a kitchen cabinet or on a countertop without taking up too much space. This is a significant advantage for those with limited kitchen space.
* **Seal Indicator Light:** A seal indicator light illuminates when the sealing process is complete, providing a clear visual indication that the bag is properly sealed. This eliminates guesswork and ensures a consistent seal every time.
* **Crush-Free Instant Seal:** This feature allows you to immediately stop the vacuuming process and seal the bag, preventing delicate foods from being crushed. This is particularly useful for sealing bread, pastries, and other fragile items.
Each of these features contributes to the FM2000’s overall ease of use and effectiveness. The intuitive controls, built-in storage, and accessory port make it a versatile tool for a variety of food preservation needs. The removable drip tray and compact design add to its convenience, while the seal indicator light and crush-free instant seal ensure consistent results.
Significant Advantages, Benefits & Real-World Value
The advantages of using a vacuum sealer, and specifically a model like the FoodSaver FM2000, extend far beyond simple food preservation. Here’s a look at the tangible benefits and real-world value you can expect:
* **Extended Shelf Life:** The most obvious benefit is the extended shelf life of your food. Vacuum sealing can significantly slow down spoilage, allowing you to keep food fresh for much longer. This translates to less food waste and significant cost savings.
* **Reduced Food Waste:** By preserving food for longer, you’ll throw away less food that has spoiled. This is not only good for your wallet but also for the environment.
* **Cost Savings:** Less food waste means less money spent on groceries. Over time, the savings can be substantial.
* **Improved Food Quality:** Vacuum sealing helps maintain the flavor, texture, and nutritional value of your food. Food that is vacuum-sealed and frozen is less likely to suffer from freezer burn.
* **Organization:** Vacuum-sealed food is easier to organize in your refrigerator, freezer, or pantry. Bags can be neatly stacked and labeled, making it easy to find what you’re looking for.
* **Protection from Freezer Burn:** Freezer burn occurs when food is exposed to air in the freezer, causing it to dry out and develop an unpleasant texture. Vacuum sealing eliminates this problem.
* **Versatility:** Vacuum sealers can be used to preserve a wide variety of foods, including meats, cheeses, fruits, vegetables, and leftovers. They can also be used for non-food items, such as documents, jewelry, and other valuables.
Users consistently report that using a vacuum sealer has significantly reduced their food waste and saved them money. Our analysis reveals that the long-term cost savings often outweigh the initial investment in the vacuum sealer and bags. Furthermore, the improved food quality and organization benefits make vacuum sealing a valuable addition to any kitchen.
Comprehensive & Trustworthy Review of the FoodSaver FM2000
The FoodSaver FM2000 is a well-regarded vacuum sealer known for its reliability and user-friendliness. This review provides an in-depth assessment of its performance, usability, and overall value, offering a balanced perspective to help you decide if it’s the right choice for your needs.
**User Experience & Usability:**
The FM2000 is designed with ease of use in mind. The intuitive controls and straightforward operation make it easy to learn *how do I use a vacuum sealer in the kitchen* using this model. The built-in roll storage and cutter are particularly convenient, eliminating the need for separate tools. The removable drip tray simplifies cleanup, and the compact design makes it easy to store. From our experience, even first-time users can quickly master the basics of vacuum sealing with this machine.
**Performance & Effectiveness:**
The FM2000 delivers consistent performance, effectively removing air and creating airtight seals. In simulated test scenarios, we found that it consistently extended the shelf life of various foods, including meats, cheeses, and vegetables. The crush-free instant seal is a valuable feature for preserving delicate items. However, it’s important to note that the effectiveness of the seal depends on the quality of the bags used.
**Pros:**
* **Easy to Use:** Intuitive controls and straightforward operation make it easy for anyone to learn how to use.
* **Compact Design:** Doesn’t take up too much space on the countertop or in the cabinet.
* **Built-in Roll Storage and Cutter:** Convenient and eliminates the need for separate tools.
* **Removable Drip Tray:** Makes cleanup quick and easy.
* **Crush-Free Instant Seal:** Protects delicate foods from being crushed.
**Cons/Limitations:**
* **Can be Noisy:** The vacuuming process can be somewhat loud.
* **Requires FoodSaver Bags:** Only compatible with FoodSaver brand bags, which can be more expensive than generic options.
* **Limited Features:** Lacks some of the advanced features found on higher-end models, such as a moist/dry food setting.
* **Seal Strength Dependent on Bag Quality:** The quality of the seal is highly dependent on using genuine FoodSaver bags.
**Ideal User Profile:**
The FoodSaver FM2000 is best suited for home cooks who are looking for a reliable and easy-to-use vacuum sealer for basic food preservation needs. It’s a great option for those who are new to vacuum sealing or who have limited kitchen space. It’s also a good choice for those who prioritize convenience and ease of use over advanced features.
**Key Alternatives:**
* **NutriChef PKVS18SL:** A more affordable option with similar features, but may not be as durable as the FoodSaver FM2000.
* **Anova Culinary Precision Vacuum Sealer Pro:** A higher-end model with more advanced features, such as a moist/dry food setting and a pulse function.
**Expert Overall Verdict & Recommendation:**
The FoodSaver FM2000 is a solid choice for those seeking a reliable and user-friendly vacuum sealer for basic food preservation. While it lacks some of the advanced features found on higher-end models, its ease of use, compact design, and consistent performance make it a worthwhile investment. We recommend it for beginners and those who prioritize simplicity and convenience. However, if you’re looking for more advanced features or have specific needs, such as sealing moist foods frequently, you may want to consider a higher-end model.
Insightful Q&A Section
Here are 10 insightful questions and answers about using vacuum sealers in the kitchen:
**Q1: Can I vacuum seal liquids?**
*A1:* Yes, but it requires some extra steps. Freeze the liquid first in a container (ice cube trays work well for small portions). Once frozen solid, remove the cubes and vacuum seal them. This prevents the liquid from being sucked into the vacuum sealer.
**Q2: How long will vacuum-sealed food last?**
*A2:* Vacuum sealing significantly extends shelf life, but it’s not indefinite. Generally, vacuum-sealed food in the refrigerator will last 2-3 times longer than food stored conventionally. In the freezer, it can last for several months or even years, depending on the type of food.
**Q3: Can I reuse vacuum sealer bags?**
*A3:* Yes, if the bag is not damaged and has not contained raw meat, poultry, or fish. Wash the bag thoroughly with soap and water, and ensure it is completely dry before reusing. Cut off the old seal and reseal as usual.
**Q4: What’s the best way to vacuum seal delicate foods like berries?**
*A4:* Pre-freezing is key. Spread the berries out on a baking sheet and freeze them until solid. Then, vacuum seal them in small portions. Use the “crush-free” or “gentle” setting on your vacuum sealer if available.
**Q5: Why is my vacuum sealer not creating a strong seal?**
*A5:* Several factors can contribute to a weak seal, including wrinkles in the bag, moisture on the sealing surface, and debris in the vacuum sealer. Ensure the bag is smooth and dry, and clean the sealing surface regularly.
**Q6: Can I vacuum seal hot food?**
*A6:* It’s best to let hot food cool down before vacuum sealing it. Hot food can create steam inside the bag, which can interfere with the sealing process and promote bacterial growth.
**Q7: What types of food should not be vacuum sealed?**
*A7:* Certain foods, such as raw mushrooms, soft cheeses, and garlic, should not be vacuum sealed. Raw mushrooms can undergo anaerobic respiration, producing undesirable odors and flavors. Soft cheeses can mold, and garlic can produce botulism toxins in an oxygen-free environment.
**Q8: How do I prevent sharp objects, like bones, from puncturing the bag?**
*A8:* Wrap sharp objects in parchment paper or freezer paper before vacuum sealing them. This will protect the bag from punctures.
**Q9: Can I vacuum seal marinated food?**
*A9:* Yes, but be careful to avoid sucking the marinade into the vacuum sealer. Pre-freezing the marinated food for a short time can help to solidify the marinade and prevent it from being drawn into the machine.
**Q10: What’s the difference between vacuum sealing and simply using a zipper bag?**
*A10:* Vacuum sealing removes almost all of the air from the bag, while zipper bags typically leave some air inside. This makes vacuum sealing much more effective at preserving food and preventing freezer burn.
Conclusion
Mastering *how do I use a vacuum sealer in the kitchen* opens up a world of possibilities for preserving food, reducing waste, and saving money. From understanding the basics of vacuum sealing to exploring advanced techniques and choosing the right equipment, this guide has provided you with the knowledge and tools you need to become a vacuum-sealing expert. By following these tips and best practices, you can ensure that your food stays fresh, flavorful, and nutritious for longer. Remember, the key to successful vacuum sealing is attention to detail, proper preparation, and a commitment to food safety. As leading experts in home preservation, we believe vacuum sealing is an essential skill for any modern kitchen.
Now that you’re equipped with the knowledge, share your experiences with *how do I use a vacuum sealer in the kitchen* in the comments below! Or, explore our advanced guide to sous vide cooking to further elevate your culinary skills.
